
Iron-on patches are a fun and creative way to personalize clothing, backpacks, hats, jackets, and other fabric items. Whether you want to showcase your artwork, cover a tear in your favorite jeans, or create custom designs for friends and family, learning how to make your own iron-on patches can be a rewarding DIY project.
The basic process involves creating a patch design, attaching it to a durable fabric, and adding a heat-activated adhesive backing that allows the patch to be applied with an iron. With the right tools and materials, you can make professional-looking patches right at home.
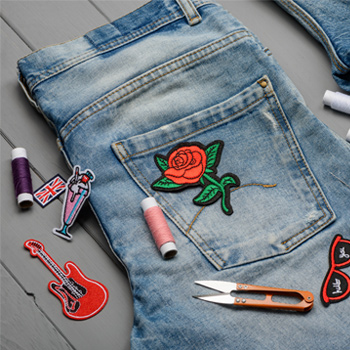
Tools and Materials Needed
- Base fabric (felt, twill, canvas, or denim)
- Embroidery thread, fabric paint, or fabric markers
- Embroidery needle
- Embroidery hoop (optional)
- Fabric marker or pencil
- Printed design template
- Sharp fabric scissors
- Fusible webbing or iron-on adhesive backing
- Iron
- Ironing board or heat-resistant surface
- Pressing cloth, parchment paper, or wax paper
- Fray Check or fabric sealant (optional)
- Ruler or measuring tape
Step 1: Create or Choose Your Design
Start by selecting the design you want on your patch. Simpler designs tend to work best, especially for beginners. Logos, initials, symbols, mascots, and simple illustrations are excellent choices.
Print your design or sketch it on paper first. If you’re hand-embroidering, avoid designs with extremely fine details since they can be difficult to stitch cleanly.
Once you’re satisfied with the design, transfer it onto your patch fabric using a fabric marker, transfer paper, or by tracing directly onto the material.
Step 2: Cut and Prepare the Patch Fabric
Choose a sturdy fabric that can withstand regular wear and washing. Twill is commonly used for professional patches, while felt is a beginner-friendly option because it resists fraying. Denim and canvas also work well.
Cut the fabric slightly larger than your finished design. Leaving a small border around the artwork gives you room to trim and finish the patch later.
If you’re using an embroidery hoop, secure the fabric tightly before beginning your design work.
Step 3: Add Your Design
Now it’s time to bring your patch to life.
Embroidered Patch Method
Using embroidery thread and a needle, stitch your design onto the fabric. Take your time and keep stitches even for the best appearance. Popular embroidery stitches include:
- Satin stitch for solid areas
- Backstitch for outlines
- Chain stitch for decorative borders
- French knots for texture
Painted Patch Method
If embroidery isn’t your style, fabric paint or fabric markers provide a quicker alternative. Carefully color your design and allow it to dry completely according to the manufacturer’s instructions. Heat-set the paint if recommended.
Step 4: Trim the Patch
After completing the design, cut the patch to its final shape. You can create:
- Circles
- Squares
- Rectangles
- Shields
- Custom shapes
Use sharp scissors for clean edges. Leave a small border around the artwork to help maintain the patch’s structure and appearance.
If you’re using a fabric that tends to fray, apply a thin layer of fabric sealant around the edges to increase durability.
Step 5: Apply the Iron-On Backing
This is the step that transforms your handmade patch into an iron-on patch.
Cut a piece of fusible webbing or heat-activated adhesive slightly smaller than the patch itself. Position the adhesive on the back of the patch according to the manufacturer’s instructions.
Place a pressing cloth or parchment paper over the patch and press with a hot iron for the recommended amount of time. Most adhesives bond within 10 to 20 seconds of firm heat and pressure.
Allow the patch to cool completely before handling it.
Step 6: Test the Patch
Before applying the patch to your favorite jacket or backpack, test it on a scrap piece of fabric. Testing first can save you from damaging a garment or wasting your hard work. This allows you to verify:
- Proper adhesion
- Correct iron temperature
- Durability after cooling
Step 7: Apply the Patch to Your Garment
When you’re ready to attach the patch:
- Place the garment on a flat ironing surface.
- Position the patch exactly where you want it.
- Cover the patch with a pressing cloth.
- Press firmly with a hot iron for 10–15 seconds.
- Allow the area to cool completely.
- Check the edges and reapply heat if necessary.
For best results, use iron-on patches on durable fabrics such as denim, cotton, canvas, and polyester blends. Heavy fabrics tend to provide the strongest bond.
Tips for Better DIY Iron-On Patches
To create patches that look more professional:
- Use twill fabric for a traditional patch appearance.
- Keep designs simple when hand-embroidering.
- Trim edges carefully for a clean finish.
- Use high-quality fusible webbing.
- Allow patches to cool completely before handling.
- Wash garments in cool water to help preserve the adhesive backing.
With a little practice, you’ll be able to create unique custom patches for clothing, uniforms, clubs, sports teams, gifts, and personal projects.
Need Professionally Made Custom Iron-On Patches?
Making your own iron-on patches is a great DIY project, but if you need patches for a business, organization, school, sports team, event, or large order, professional manufacturing can provide cleaner embroidery, more durable materials, and consistent results. Contact American Patch today to get a custom iron-on patch quote and bring your design to life with high-quality custom patches made to your exact specifications.