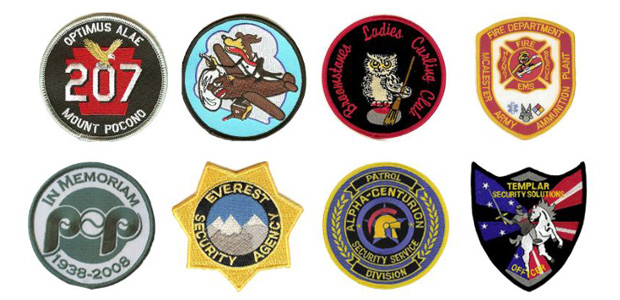
You know exactly how you want the patch that represents your motorcycle club, scouting organization or business to look like. But it’s the little details that go into designing embroidered patches that is tripping you up. Regardless of your design background, we can guide you through the process of designing embroidered patches you will be proud of. Here is a short guide to help you design the perfect patch.
Sizing Embroidered Patches
The size of a patch is one of the most important design decisions you will make. If the patch is meant for the back of a jacket or a backpack, then a large patch would be appropriate. Smaller patches are better for children, or if the patch is meant for a tiny item, such as the brim of a hat.
Your images must be easy to read and recognizable. Depending on the size of the patch, adding too many intricate details can make it look cluttered or muddy. A large patch has more room for complex design elements, but a smaller patch needs to focus on the primary image. Regardless of the size, keeping it simple is best for beginners.
Important Design Details
The embroidery percentage is the amount of the patch sewn with threads. We sew your design on to fabric known as the twill or substrate, which we use as a background color. If your patch has twill showing, that means you have less than a 100% embroidery percentage. The twill is an important part of your design, especially if it’s a solid color. It often costs less to have a lower embroidery percentage.
There are two patch border options. Merrowed borders are slightly raised and surround the patch. They are best for simple designs, such as squares, ovals, circles and similar shapes. Complex designs often use die-cut borders, though some simple designs can use it too. Die-cut borders are excellent for designs that have pieces sticking out.
Embroidered patches can use several backing options. These include heat seal, plastic, hook and loop, self-sticking and unbacked patches. Each option has its own unique qualities that should be considered when deciding on which one to use. Heat seal is a very popular option, as well as hook and loop. An unbacked patch is sewn on, so if your sewing skills are up to snuff this is an option to consider.
Best Practices For Embroidered Patches
We have hundreds of colors to choose from, but keep in mind that the more colors you use, the muddier a patch can look. You may also choose the color of the substrate or twill if your design is less than 100% embroidered.
Most embroidered patches include text, and the size of the text is important. For small text, our minimum recommendation is 0.25” high. Simple fonts like Helvetica or Arial are the standard for small text. More ornate fonts are difficult to see when used with small text. Larger patches do not have this design limitation, and complex fonts are much easier to work with.
When choosing thread colors, keep in mind that we include the first eight colors in the price. An easy way to keep the amount of thread colors to a minimum is to combine similar colors. So, if you have two shades of red in the design, consider using just one shade instead of the two. Another thing to keep in mind is color contrast. Using colors next to each other that are similar can look blurry, but opposite colors are more vibrant. For example, if you are creating a small patch and use yellow-green and basic green threads next to each other it will look fuzzy. Using opposite colors, such as yellow and violet, will stand out more. A brilliant tool to use when designing your patch is a color wheel which visibly shows you the best color combinations.
Patch design can be difficult if you are a beginner. Finding inspiration is hard for experienced designers too, so don’t be too hard on yourself. It is tempting to merge many elements into a single design but keeping your patch simple is often best. Remember that the simplest designs have the greatest impact. If you want a more ornate look, you can often achieve that with different stitching and blended colors used for stunning gradients.
How to Order
We have many years of experience and would love to help you. First, fill out our easy online form to get a free quote. You will need to submit your artwork and know the patch size and the quantity needed. After you submit our online form, you will receive written confirmation from American Patch by fax or email. Then we will ask for credit card information to set up billing.
After placing your order, we will create a physical sample of it and send a scan of the image to you. This way you can see exactly how it will look. If you are not happy with the design, we will make revisions at this point. In the unlikely event you are not happy with the order and cancel it, there is a cancellation charge after the sample has been created.
Contact American Patch today to place an order or ask us a question. We look forward to creating the perfect patch for you!